Engineers and optical technicians often deal with the same recurring frustration: measurement data that looks inconsistent, unclear, or unstable. Even when using high-resolution sensors or advanced inspection equipment, the results still fail to match real-world expectations. This creates delays, product defects, and high rework costs. The deeper issue, however, usually comes from how light angles and wavefronts are captured—not the sensor itself.
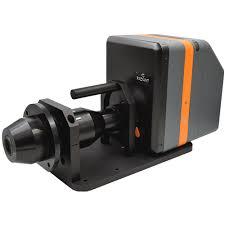
A high-precision conoscope lens is one of the most effective tools for solving these optical accuracy problems and ensuring reliable measurement results.
Why Standard Optical Systems Fail in Complex Light Measurement
1. Poor Angular Light Capture
Traditional imaging lenses are designed for straight-line light paths. They struggle to capture full angular distributions, causing missing data points and inaccurate interpretations of birefringence, LCD pixel structure, or optical surface quality.
2. Inconsistent Measurement Output
Without a method to analyze light cones or polarization changes properly, the system produces unstable results. This leads to repeated testing and inconsistent quality control.
3. Limited Field Mapping Capability
Most lenses cannot visualize interference patterns or uniformity issues in materials. This becomes a major problem in display testing, optical inspection, and research applications.
4. Distortion and Loss of Detail
Standard lenses introduce optical distortions, reducing clarity and affecting particle analysis, defect detection, and material evaluation.
How a Conoscope Lens Solves These Performance Issues
1. Captures Full Angular Information
A conoscope lens is designed to collect cone-shaped light paths. This allows engineers and researchers to analyze polarization states, birefringence effects, and refractive differences with much higher precision.
2. Delivers Stable, Repeatable Measurements
With controlled optical geometry, the measurement system provides consistent output even under complex lighting conditions. This stability reduces rework and supports accurate quality inspection.
3. High-Resolution Interference Pattern Imaging
The lens enables clear visualization of:
-
Stress patterns
-
Display pixel behavior
-
Liquid crystal structures
-
Optical material defects
This makes it indispensable for scientific research and high-end display technology.
4. Precision Engineering for Accuracy
A premium conoscope lens is engineered with high transparency, minimal distortion, and excellent refractive stability. It maintains optical performance even during long test cycles or environmental changes.
Where a Conoscope Lens Provides the Greatest Value
LCD, OLED, and Display Testing
It allows engineers to observe pixel structures, color uniformity, and retardation patterns with unmatched clarity.
Material Stress Analysis
Industries studying glass, polymers, and crystals rely on conoscope lenses to detect internal stress and birefringence changes.
Optical R&D and Laboratory Applications
Researchers use the lens for wavefront studies, optical behavior analysis, and precision material evaluation.
Production-Line Inspection
Manufacturers depend on conoscope systems to maintain consistent quality in high-volume optical components.
Conclusion
If your optical measurements continue to suffer from unstable data, missing angular information, or distorted patterns, the problem is likely in the lens—not the sensor. A conoscope lens offers reliable, high-resolution, and angle-accurate imaging that improves measurement precision across the board. Whether you're testing displays, analyzing materials, or performing advanced optical research, upgrading to a high-quality conoscope lens is one of the most effective ways to enhance accuracy and efficiency.


